


Note: a newer version of this article has been published and reflects several changes to the platform that are not noted in this post. Please proceed here for the latest: https://www.trymyui.com/blog/2020/05/01/setup-remote-usability-test-trymyui/
After getting a lot of feedback about the difficulty of our user test setup flow, we took a dose of our own medicine to find out what was confusing our customers.
We found out that people wanted more guidance writing their test script, more descriptions for understanding special features, and a more structured, obvious experience that felt engaging and up-to-date.
After a long process of designing, collecting feedback, redesigning, and repeating, we’ve released a wholly remodeled “Create a new test” page with helpful new tips, explanations, and a simplified step-by-step flow to make setting up your user tests a lot easier.
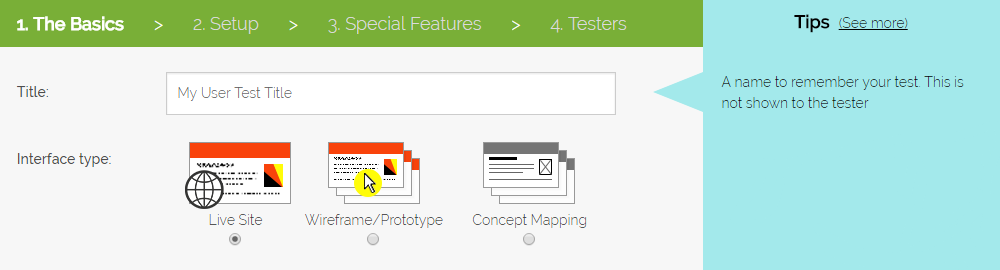
1. The Basics

We broke the process into 4 logical steps, starting with the basic parameters of the test. Enter in your title, choose the interface type you’ll be testing, paste in the URL, and pick the device you want testers to use.
Read more: Testing InVision prototypes with TryMyUI
2. Setup

Step 2 contains the meat of the test setup, where you’ll write the scenario and tasks for testers to follow. It’s important to get your test script right to get the highest quality feedback, so pay close attention to the tips, and consider taking a look at our posts on writing usability testing tasks before you finalize your test.
By the way, if your test will start with a landing page, we recommend using a 15-second Impression Test to see what people think of your site before they’ve had time to explore it.
3. Special Features

Here’s where you’ll choose which additional user testing metrics to include in the test, such as:
- psychometric surveys like SUS and PSSUQ
- the UX Crowd crowdsourced analysis tool
- UX Diagnostics surveys for task usability and completion
In this step you can also upload a non-disclosure agreement for testers to sign if your test will contain sensitive materials.
Think about which user testing surveys will be relevant to your test script, interface type, and sample size when you choose your special features, and be mindful of tester fatigue. Too many surveys can spoil your data!
4. Testers

Lastly, you’ll choose who you want to take your test. If you use testers from the TryMyUI panel, you will pick your target audience with demographic filters for factors like gender, age, country, and more.
Remember, you can select more than one subgroup for the same filter (for example, “All North America” and “United Kingdom + Ireland” have both been chosen in the Country filter above).

You can also input custom requirements, from extra demographic factors (“Must speak Spanish”) to interests (“Must consider yourself an environmentalist”) or other steps testers will need to take (“Must use your real email during the test to open a confirmation link”).
The indicator at the bottom shows the availability of your selected demographics. If the availability is low, consider loosening some factors to get your results faster.
Check out the new flow at Trymata.com if you have an account, or sign up to create your first usability test. Let us know what you think – user feedback shaped this page, and always keeps shaping our product!
Keep discovering more of our amazing features: