Usability testing is a critical component of the product design process, ensuring that the end product is functional and user-friendly. A key tool used during usability testing is the low-fidelity prototype (low-fi prototype).
This simplified product version captures its basic structure and functionality without focusing on design aesthetics. This method allows designers to test concepts early, saving time and resources while gathering invaluable user feedback.
In this blog, we will explore the concept of a low-fidelity prototype, its role in usability testing, its benefits, how to create it, and best practices for effective implementation.
What is a Low Fidelity Prototype?
A low fidelity prototype (lo-fi prototype) is a simple, often hand-drawn or minimally detailed representation of a product or interface. Unlike high fidelity prototypes, which include detailed design and mimic complex interactions, low-fi prototypes focus on core functions and user flows.
Typically created during the early stages of the product development process, these prototypes help designers and stakeholders explore broad concepts and test initial ideas without significant investment in time or resources.
Low-fi prototypes can take various forms, including paper prototypes, sticky notes, or basic digital wireframes. The goal is to visualize the design concept quickly, map out user flows, and validate proposed functionality with minimal effort.
These simple prototypes allow teams to refine ideas and align on objectives before transitioning to high fidelity prototyping or coded prototypes.
Why is Low Fidelity Prototyping Important?
Low fidelity prototyping is crucial in product development because it encourages experimentation, collaboration, and feedback. Here’s why it’s essential:
- Cost-Efficient: Creating a low fidelity prototype is a low-cost method of exploring design ideas. Whether you’re sketching on paper or using a digital prototyping tool, lo-fi prototypes require minimal resources compared to high fidelity prototypes or fully functional coded prototypes.
- Encourages Iteration: In the early stages, teams can quickly revise low fidelity prototypes based on feedback. This agile approach allows design teams and non-designers to test various concepts without worrying about time-consuming revisions.
- Focuses on Core Functions: By stripping away unnecessary visual elements and features, low fidelity prototypes enable teams to concentrate on the core functions and user needs. This helps refine broad concepts and ensures the initial idea aligns with the target audience.
- Promotes Collaboration: Lo-fi prototyping encourages collaboration among UX designers, stakeholders, and real users. Because it’s easy to create, team members can use paper prototypes or draw diagrams to communicate ideas and brainstorm innovative solutions.
- Collects Honest Feedback: Low-fidelity prototypes’ simplicity helps users provide honest feedback without being influenced by polished visual design. Testing low-fidelity prototypes with real users can uncover usability issues, improve user flow, and align the design with customer feedback.
If you are finding this topic interesting, we recommend reading: Minimum Viable Product
When to Use a Low Fidelity Prototype?
Low fidelity prototypes are most effective in the early stages of the product development when teams are still exploring design ideas and evaluating proposed functionality. Here are some scenarios where lo-fi prototypes are ideal:
1. In the Early Stages of Product Development
Low-fidelity prototyping is ideal for the early stages of product development, when teams brainstorm and test broad concepts. At this stage, the focus is on identifying user needs and mapping design ideas.
2. For Exploring Design Concepts
When developing a new product or feature, low-fi prototypes help visualize the initial idea without getting bogged down by details like visual design or advanced interactions. This approach lets teams focus on the big picture and ensures the design concept aligns with user expectations.
3. To Collect Early User Feedback
Testing a low-fi prototype with real users enables teams to validate proposed functionality and identify pain points. This feedback informs subsequent iterations and ensures the final product meets user expectations.
4. Before Investing in High Fidelity Prototyping
Low-fidelity prototypes act as testable artifacts to gauge whether the concept is worth pursuing. Once validated, the team can transition to high-fidelity or coded prototypes to refine the digital experience and mimic complex interactions.
How to Create a Low Fidelity Prototype
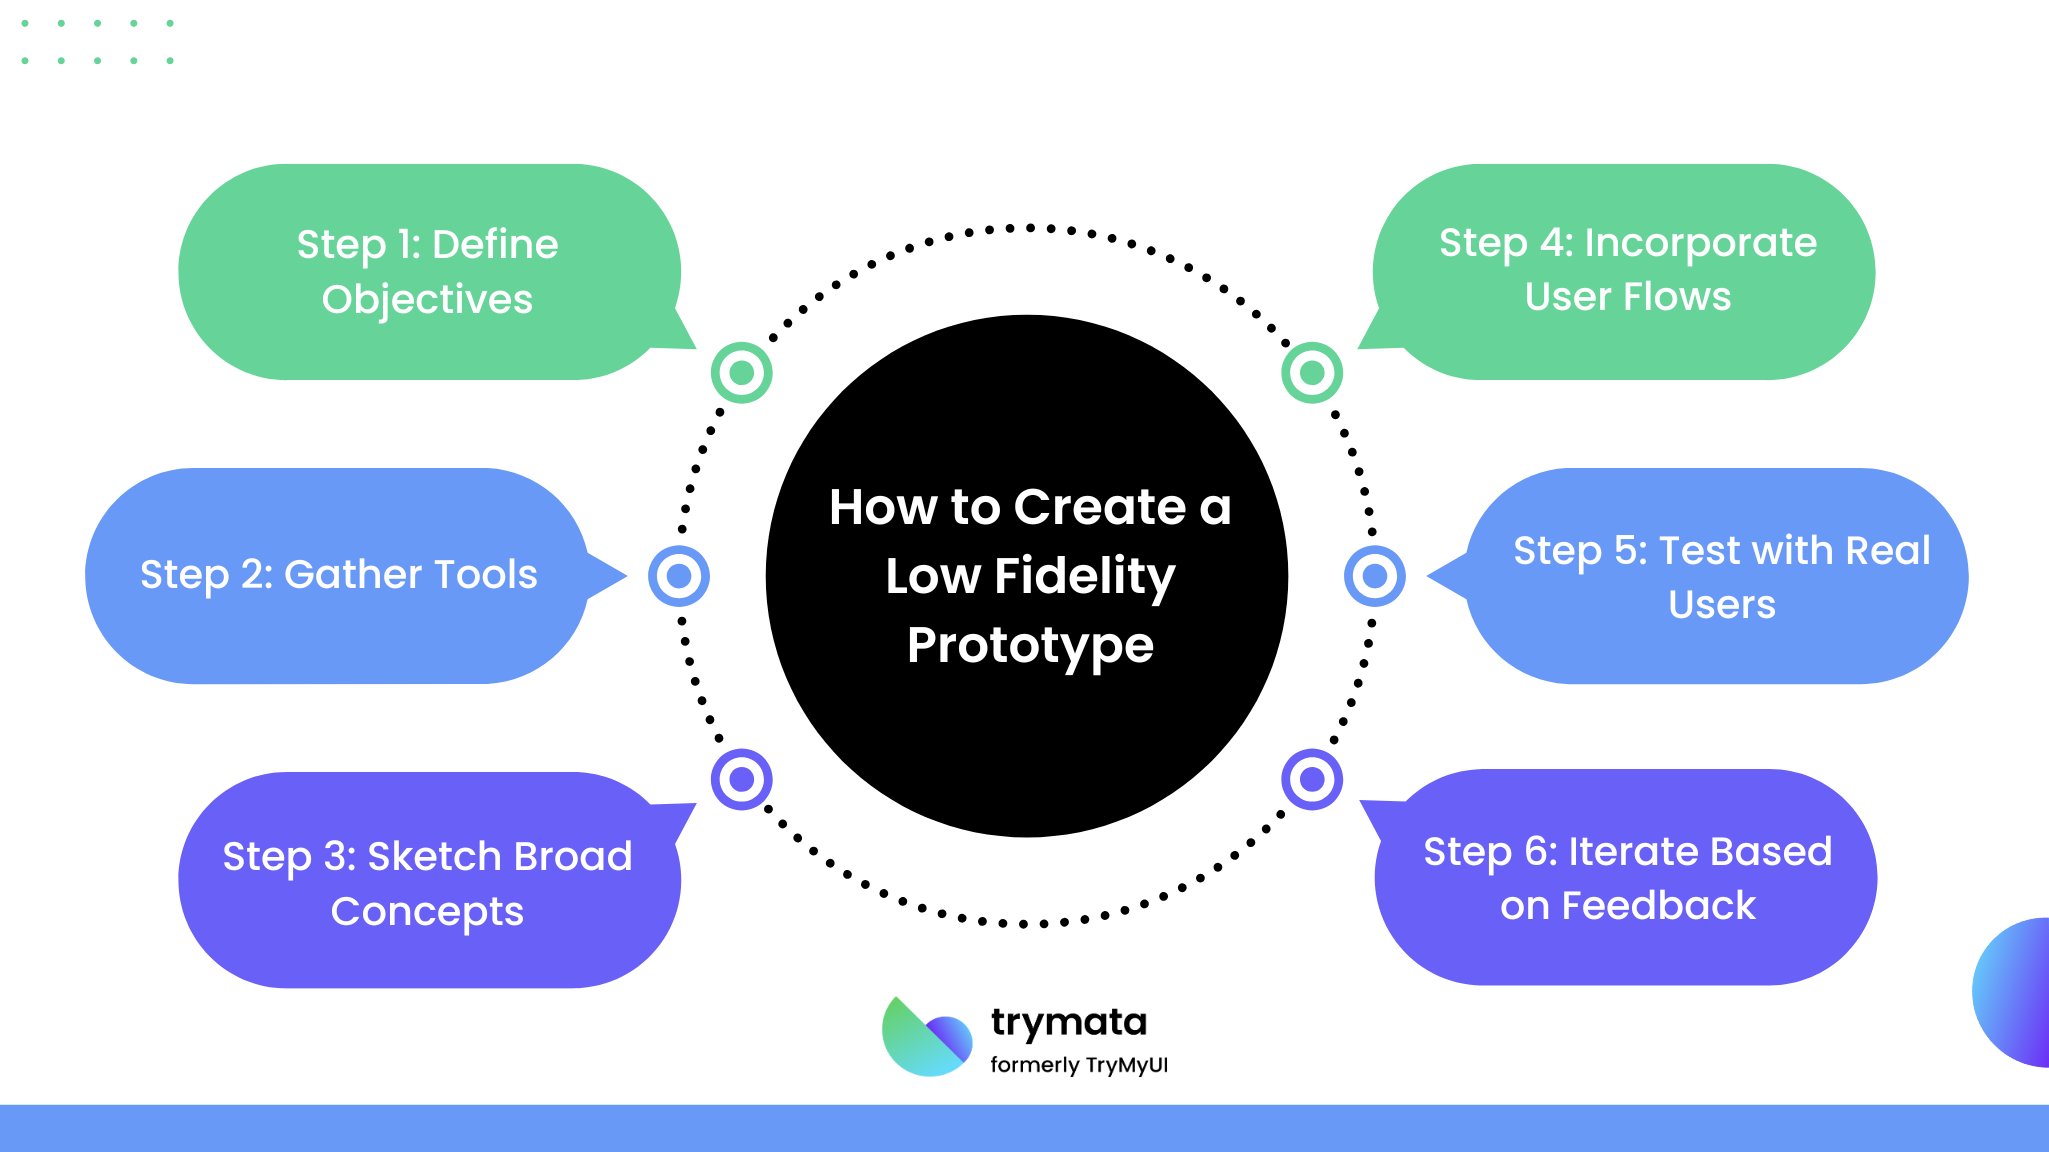
Creating a low fidelity prototype doesn’t require advanced design skills. Here’s a step-by-step guide to help you create your low fidelity prototypes:

Step 1: Define Objectives
Start by identifying the purpose of your prototype. Are you testing a specific user flow, exploring design ideas, or validating a feature with your target audience? Clearly defining your objectives ensures that your prototype focuses on the right aspects.
Step 2: Gather Tools
For low-fi prototyping, you don’t need expensive tools. Basic materials like paper, sticky notes, markers, and scissors are sufficient for paper prototyping. For a digital approach, consider using simple prototyping tools to create wireframes or clickable mockups.
Step 3: Sketch Broad Concepts
Use hand-drawn sketches or diagrams to visualize product ideas. Focus on key screens, user interface elements, and essential user flows. Avoid unnecessary details; the goal is to highlight the proposed functionality and core functions.
Step 4: Incorporate User Flows
Ensure your prototype includes a clear path for users to achieve their goals. Whether it’s navigating a website or interacting with a mobile app, the user flow should be intuitive and aligned with the intended experience.
Step 5: Test with Real Users
Present your low-fi prototype to real users for user testing. Encourage them to provide useful feedback on what works and what doesn’t. Since the prototype has limited interactivity, focus on usability and whether users understand the design concept.
Step 6: Iterate Based on Feedback
Analyze the feedback collected during testing and refine your prototype accordingly. This iterative process helps eliminate flaws and ensures the final design meets user expectations and needs.
Benefits of Low Fidelity Prototyping
Low fidelity prototyping (lo-fi prototyping) offers numerous advantages that make it a key step in the product development and design thinking process. Lo-fi prototypes facilitate effective exploration, testing, and refinement of ideas by focusing on simplicity, core functionality, and user engagement. Below are the key benefits of low fidelity prototyping:
- Simplicity and Accessibility: Low fidelity prototypes require no specialized skills, making them accessible to non-designers.
- Effective Communication: By focusing on basic user flows and functionality, teams can ensure users understand the design concept.
- Low Risk: Since they are inexpensive to create, mistakes in low fidelity prototyping have minimal impact.
- Encourages Honest Feedback: Users are more likely to provide helpful feedback when reviewing a less polished design.
- Boosts Innovation: By removing the pressure of perfection, lo-fi prototypes allow teams to think creatively.
Challenges of Low Fidelity Prototypes
While low fidelity prototypes are invaluable, they come with limitations:
- Limited Interactivity: They may not effectively mimic the final product’s functionality.
- Visual Limitations: The absence of visual design can make it harder to envision the finished product.
- Unsuitable for Complex Ideas: Projects requiring detailed interactions or digital experiences may require more than a high-fidelity prototype.
Conclusion
Low-fidelity prototypes are an essential part of the design thinking process. They enable teams to explore product ideas, test core functions, and collect user feedback during the early stages of product development.
While low fidelity and high fidelity prototypes serve different purposes, both are critical for creating digital products that meet user needs. A low-fidelity prototype helps refine design concepts, paving the way for a polished finished product. By combining creativity with iterative testing, teams can develop innovative solutions that resonate with their target audience.
Using low fidelity prototypes strategically ensures that your design process remains flexible, user-focused, and cost-effective, ultimately leading to better outcomes.
What is Prototype Testing? Definition, Methods, Example and Process


