


The best time to test any design with users is while it’s still on the drawing board. Waiting until your designs go live can lead to costly UX flaws, not to mention wasted time and effort as both designers and developers hit the rewind button.
Prototype testing allows the product team to detect usability problems before they befuddle a single real user. Then, the designers can go back and make the necessary fixes before sending the designs to the development team.
TryMyUI user testing is compatible with every major prototyping platform. Below, we’ve provided step-by-step instructions and tips for testing prototypes hosted on one of the most popular platforms: InVision.
Using InVision and TryMyUI for prototype testing
By using InVision to create your prototype and TryMyUI to test it, it’s easy to get feedback on your designs pre-launch. Below are the steps for testing an InVision prototype on TryMyUI, along with tips from our own experience.
1. Create your prototype
Upload mockups of all your screens to InVision. For an interactive prototype, add hotspots to buttons and links so users can click through your different screens. Testing interactive prototypes allows users to experiment and try out different flows.
Alternatively, you may prefer to test your prototype without interactive hotspots. Do this if you want to focus on probing users’ understanding of each screen’s purpose and contents.
2. Get the share link for your prototype
Click the “Share” button on your prototype. You will see a popup with a few options for sharing, and a private URL at the bottom.
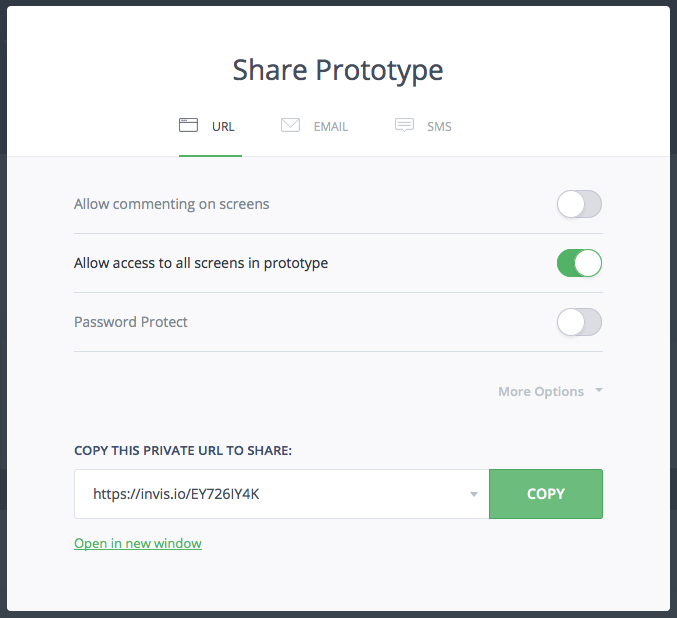
Make sure “Allow access to all screens in prototype” is turned on. If you choose to enable password protection, remember to provide the password in your first task. Under “More Options,” you can choose which screen is used as the landing page.
Remember to copy the link after you’ve finalized all the sharing settings – changing them generates a new URL.
3. Create a new test on TryMyUI
On TryMyUI, create a new usability test. After choosing your title and the tester platform, select “Wireframe/Prototype” for the interface type. The tester will receive additional instructions notifying them not to expect a fully functional website and what they should focus on.
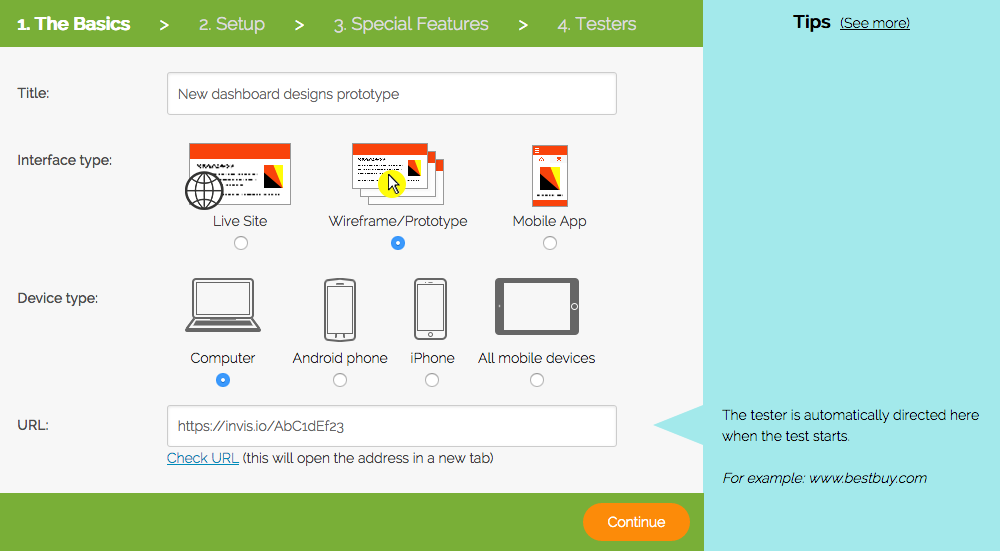
Now, paste the share link from your InVision prototype into the website URL section. You can click “Check URL” to make sure your link works. Testers will automatically be taken to this link when they start the test, so the way you see it when you open it is the same way they will see it.
Tip: Try visiting your share link in an incognito window to verify that it’s accessible.
4. Write the scenario and tasks
For prototype testing, the scenario should not only include an example situation for the user to engage in, but also any special instructions for interacting with the prototype. For example, we included this brief explanation in our scenario for testing a prototype with no interactive hotspots:
This test contains only images of webpages. None of the buttons or links work; you will only be able to look at each page. Use your arrow keys to move from one page to the next when asked.
Next, write the tasks for your test. If your prototype is interactive, write your tasks as you would for a regular usability test (but make note of anything that isn’t functional). Tasks should center around goals to accomplish.
Read more:
If your prototype isn’t interactive, your tasks should consist of questions. Below are some examples of how your tasks might begin:
How would you go about…
What steps do you need to take to…
What do you think will happen when you…
Is anything missing from this page?
Is the information here useful/clear? What questions do you have?
In your tasks, clearly communicate when the user should (or should not) move to the next screen. If several consecutive tasks will apply to the same screen, consider including, “Don’t move to the next page yet.” Similarly, when you want the user to change screens, explicitly begin your task with “Move to the next page.”
The first time users need to change screens in the prototype, include a reminder in that task to use the right arrow key. Even if you’ve included it in the scenario, some users will forget, and reminding them will prevent confusion and wasted time.
5. Launch your test
After you’ve finalized the test parameters and script, send it out to users to collect feedback!

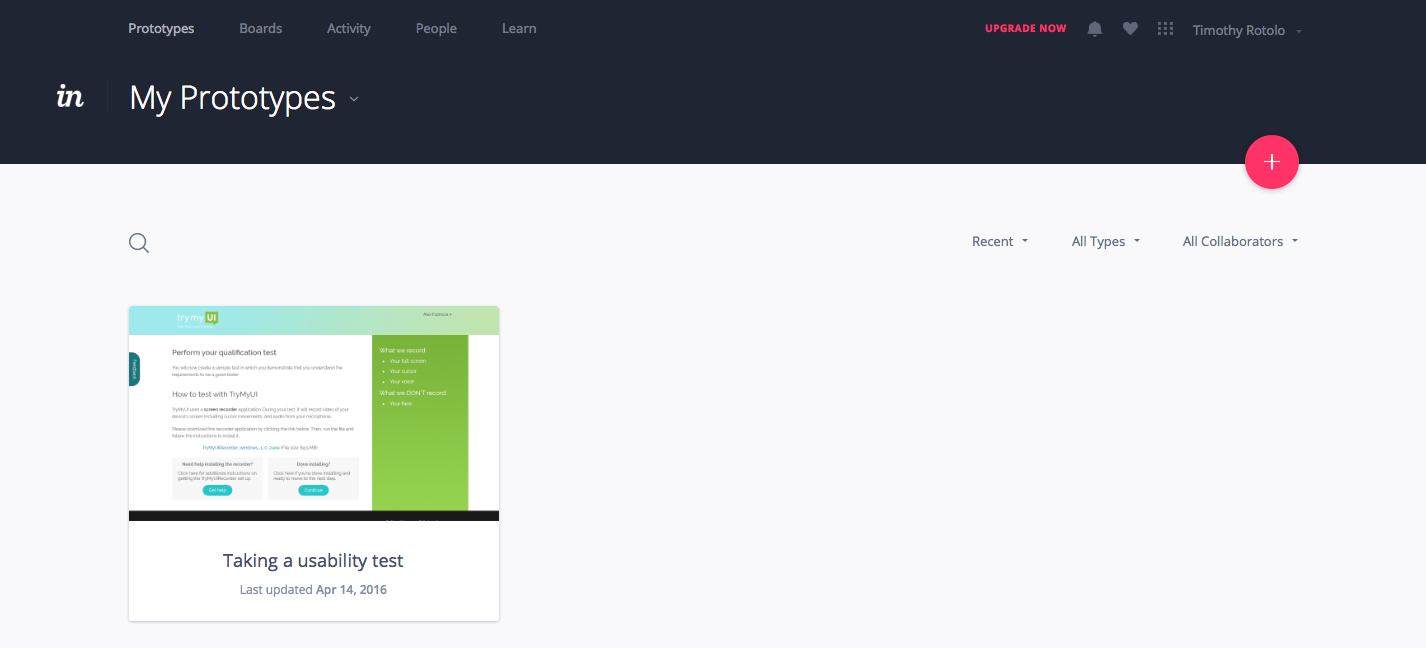
Below is an example task list from a usability test we ran on a non-interactive InVision prototype. We were testing new designs for for the pages that TryMyUI testers use to launch a qualification test. This is the exact wording we used.
Scenario:
This test contains only images of webpages. None of the buttons or links work; you will only be able to look at each page. Use your arrow keys to move from one page to the next when asked.
Scenario: You just signed up to take usability tests for TryMyUI, and after setting up your profile you are going to take a qualification test.
(Note: We began the second paragraph of our scenario with “Scenario:” to set it apart from the functionality-related instructions.)
Tasks:
- The first page is titled “Perform your qualification test.” Do you understand what you will be doing? What questions do you have? (Don’t move to the next page yet)
- How do you download and install the screen recorder?
- What do you think will happen when you click each of the 2 buttons at the bottom of the page?
- Move to the next page, “Installing the TryMyUIRecorder.” If you had clicked “Get help,” you would come to this page. Is the information here useful? What else would you want to see here?
- Move to the next page, “What to expect.” What is the main point of this page? What questions do you still have (if you have any)?
- Go to the next page, “Start your test.” What do you have to do to start the test? Do you understand these steps?
- How does this page compare to the current TryMyUI test launching process?
- The next page, “Test window launched,” will replace the last page after you click “Launch.” Is anything unclear on this page? Is anything missing?
- After becoming a qualified tester, the next page “Start your test” is the page you would see when you accept an available customer test. What do you think of the options on this page? What do you think will happen when you click each of the 2 buttons at the bottom?