Annotating your user test videos is a great way to save and share key moments from your UX research. Now, our team at Trymata has added a feature that will make this even easier. With the new release, you can create timestamped annotations from your video transcripts in an instant!
In so many cases while analyzing user test videos, the best annotation is a simple quote straight from the user’s mouth. When they put into words exactly what they are thinking or feeling – ”I didn’t like that” “That was confusing” “I wish it worked like this…” – saving those sentiments in a note can be more powerful than any of your own thoughts or comments.
We know that many researchers will flag important clips like that in their videos by just jotting down the tester’s spoken words. Given this, we decided to make it way easier to turn user quotes into timestamped notes. Our new feature update does all the work for you, creating annotations from your video transcript with just a click.
Read below for more details (with screenshots) about how it works.
How it works: Add your own instant annotations
To try out this new capability, open up any test video with transcripts.
(Note: If you don’t already have transcripts for your user test videos, you can get them for free for any test if you’re on our Enterprise or Unlimited plans. Request transcripts for your videos using the link at the bottom of your test results page – they are typically ready in under an hour.)
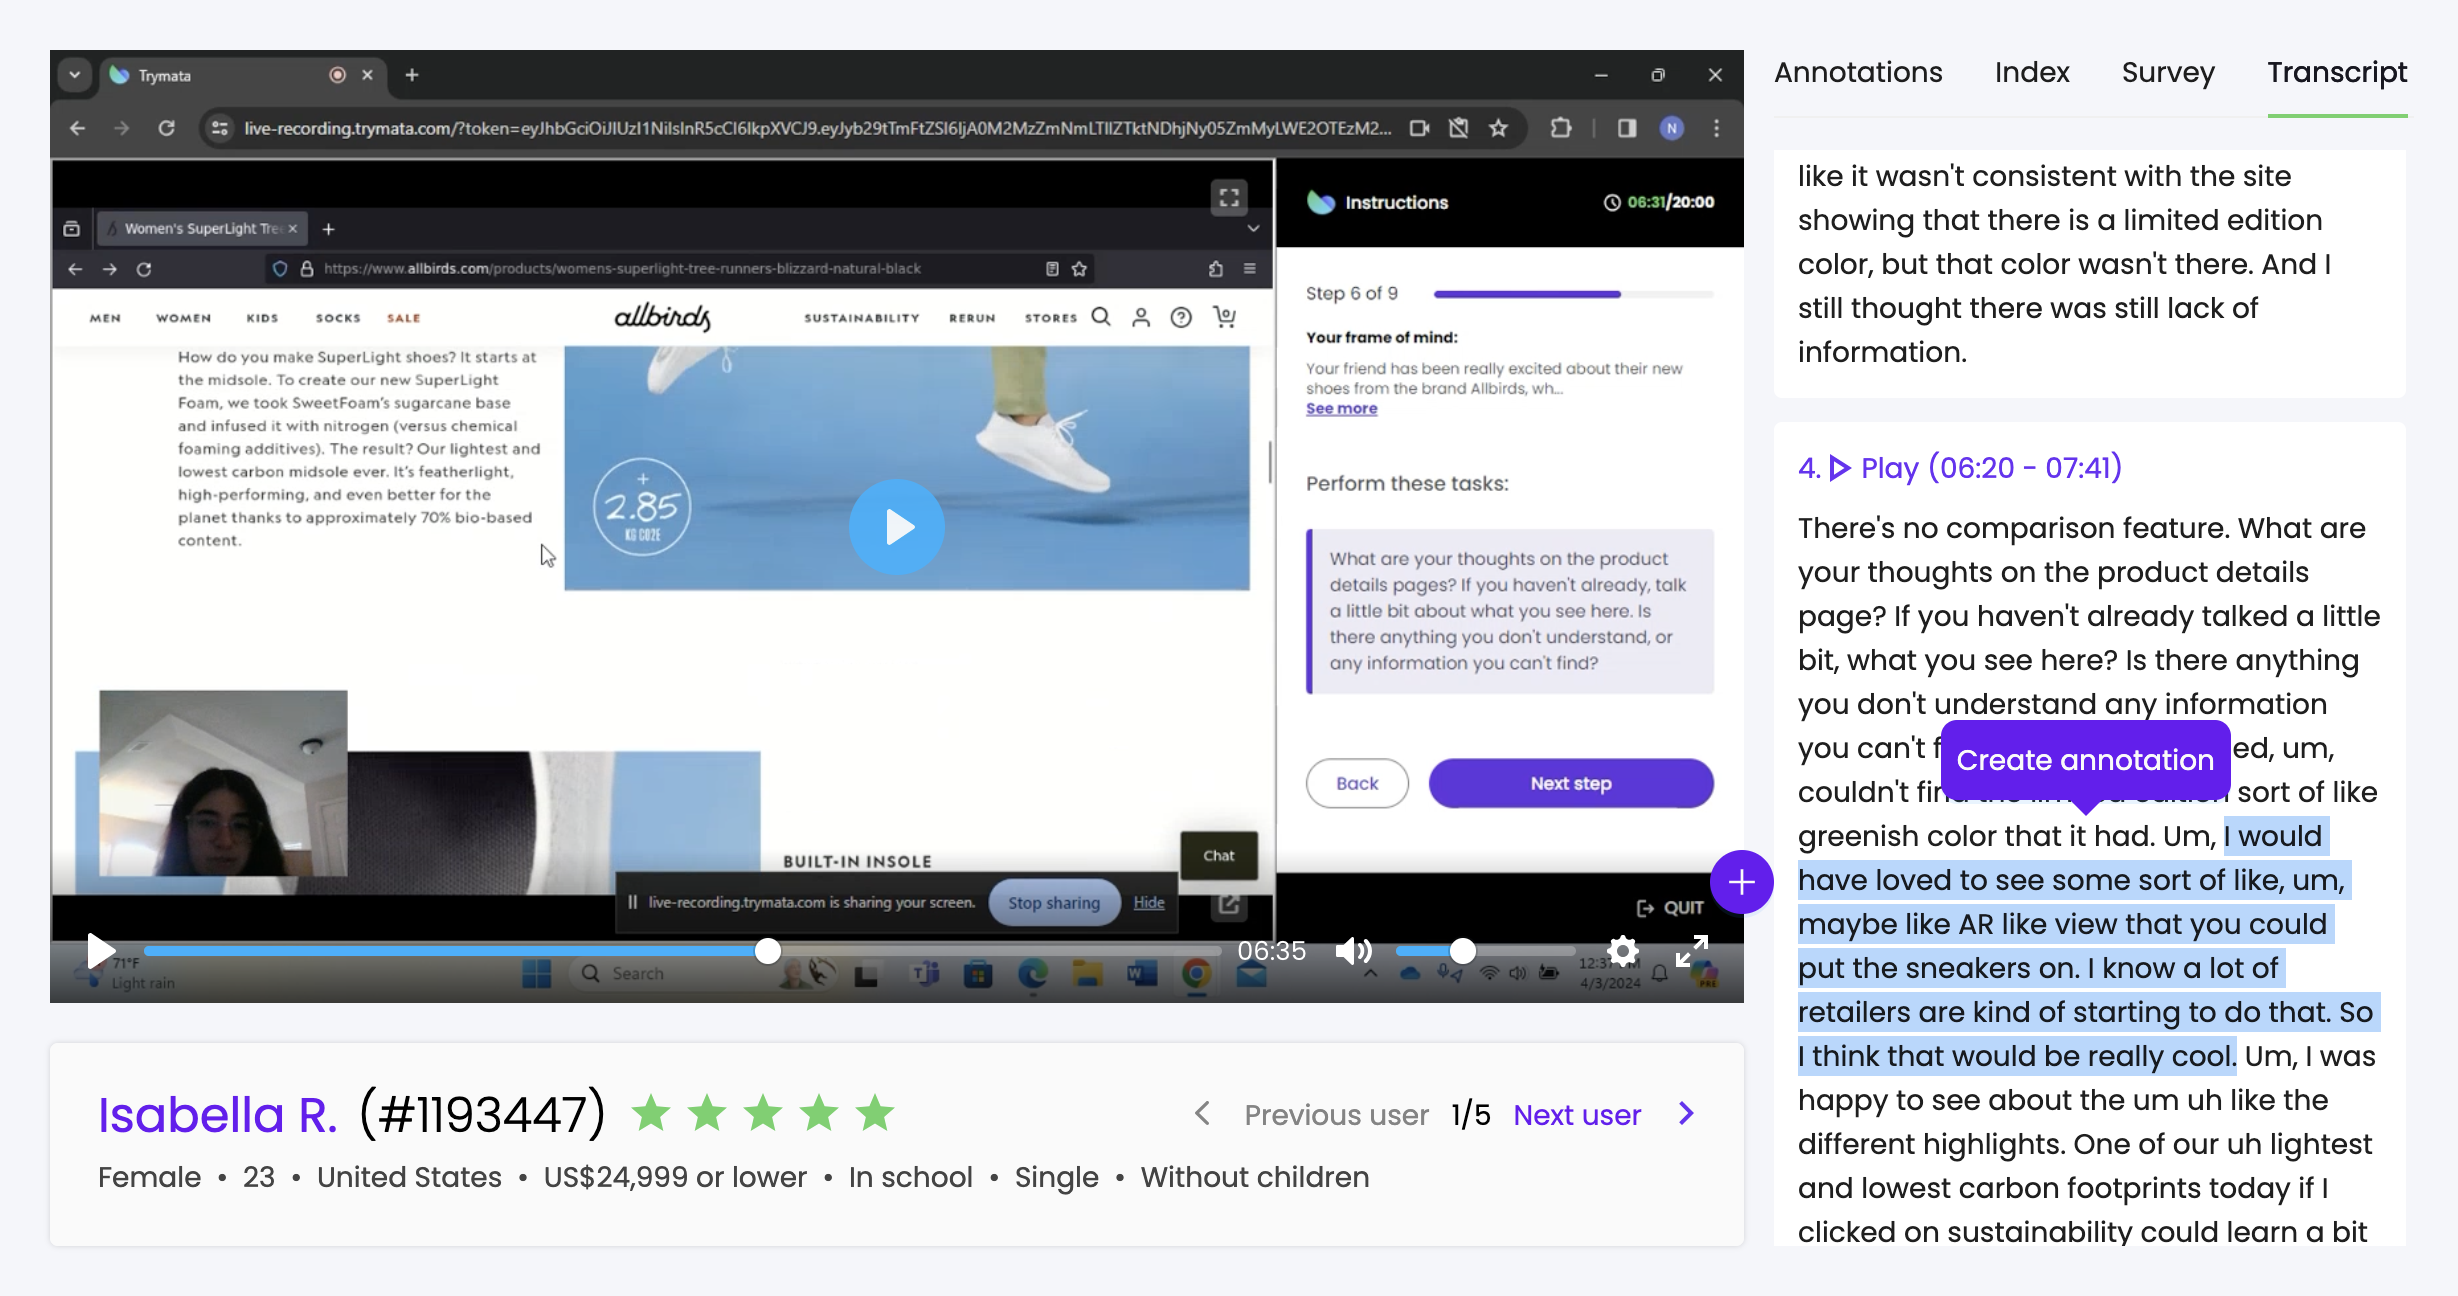
Next to the video player, open up the transcripts view. Then, in the transcript, highlight any amount of text that you want to turn into a note. When you highlight it, automatically a small popup button will show that says “Create annotation”:

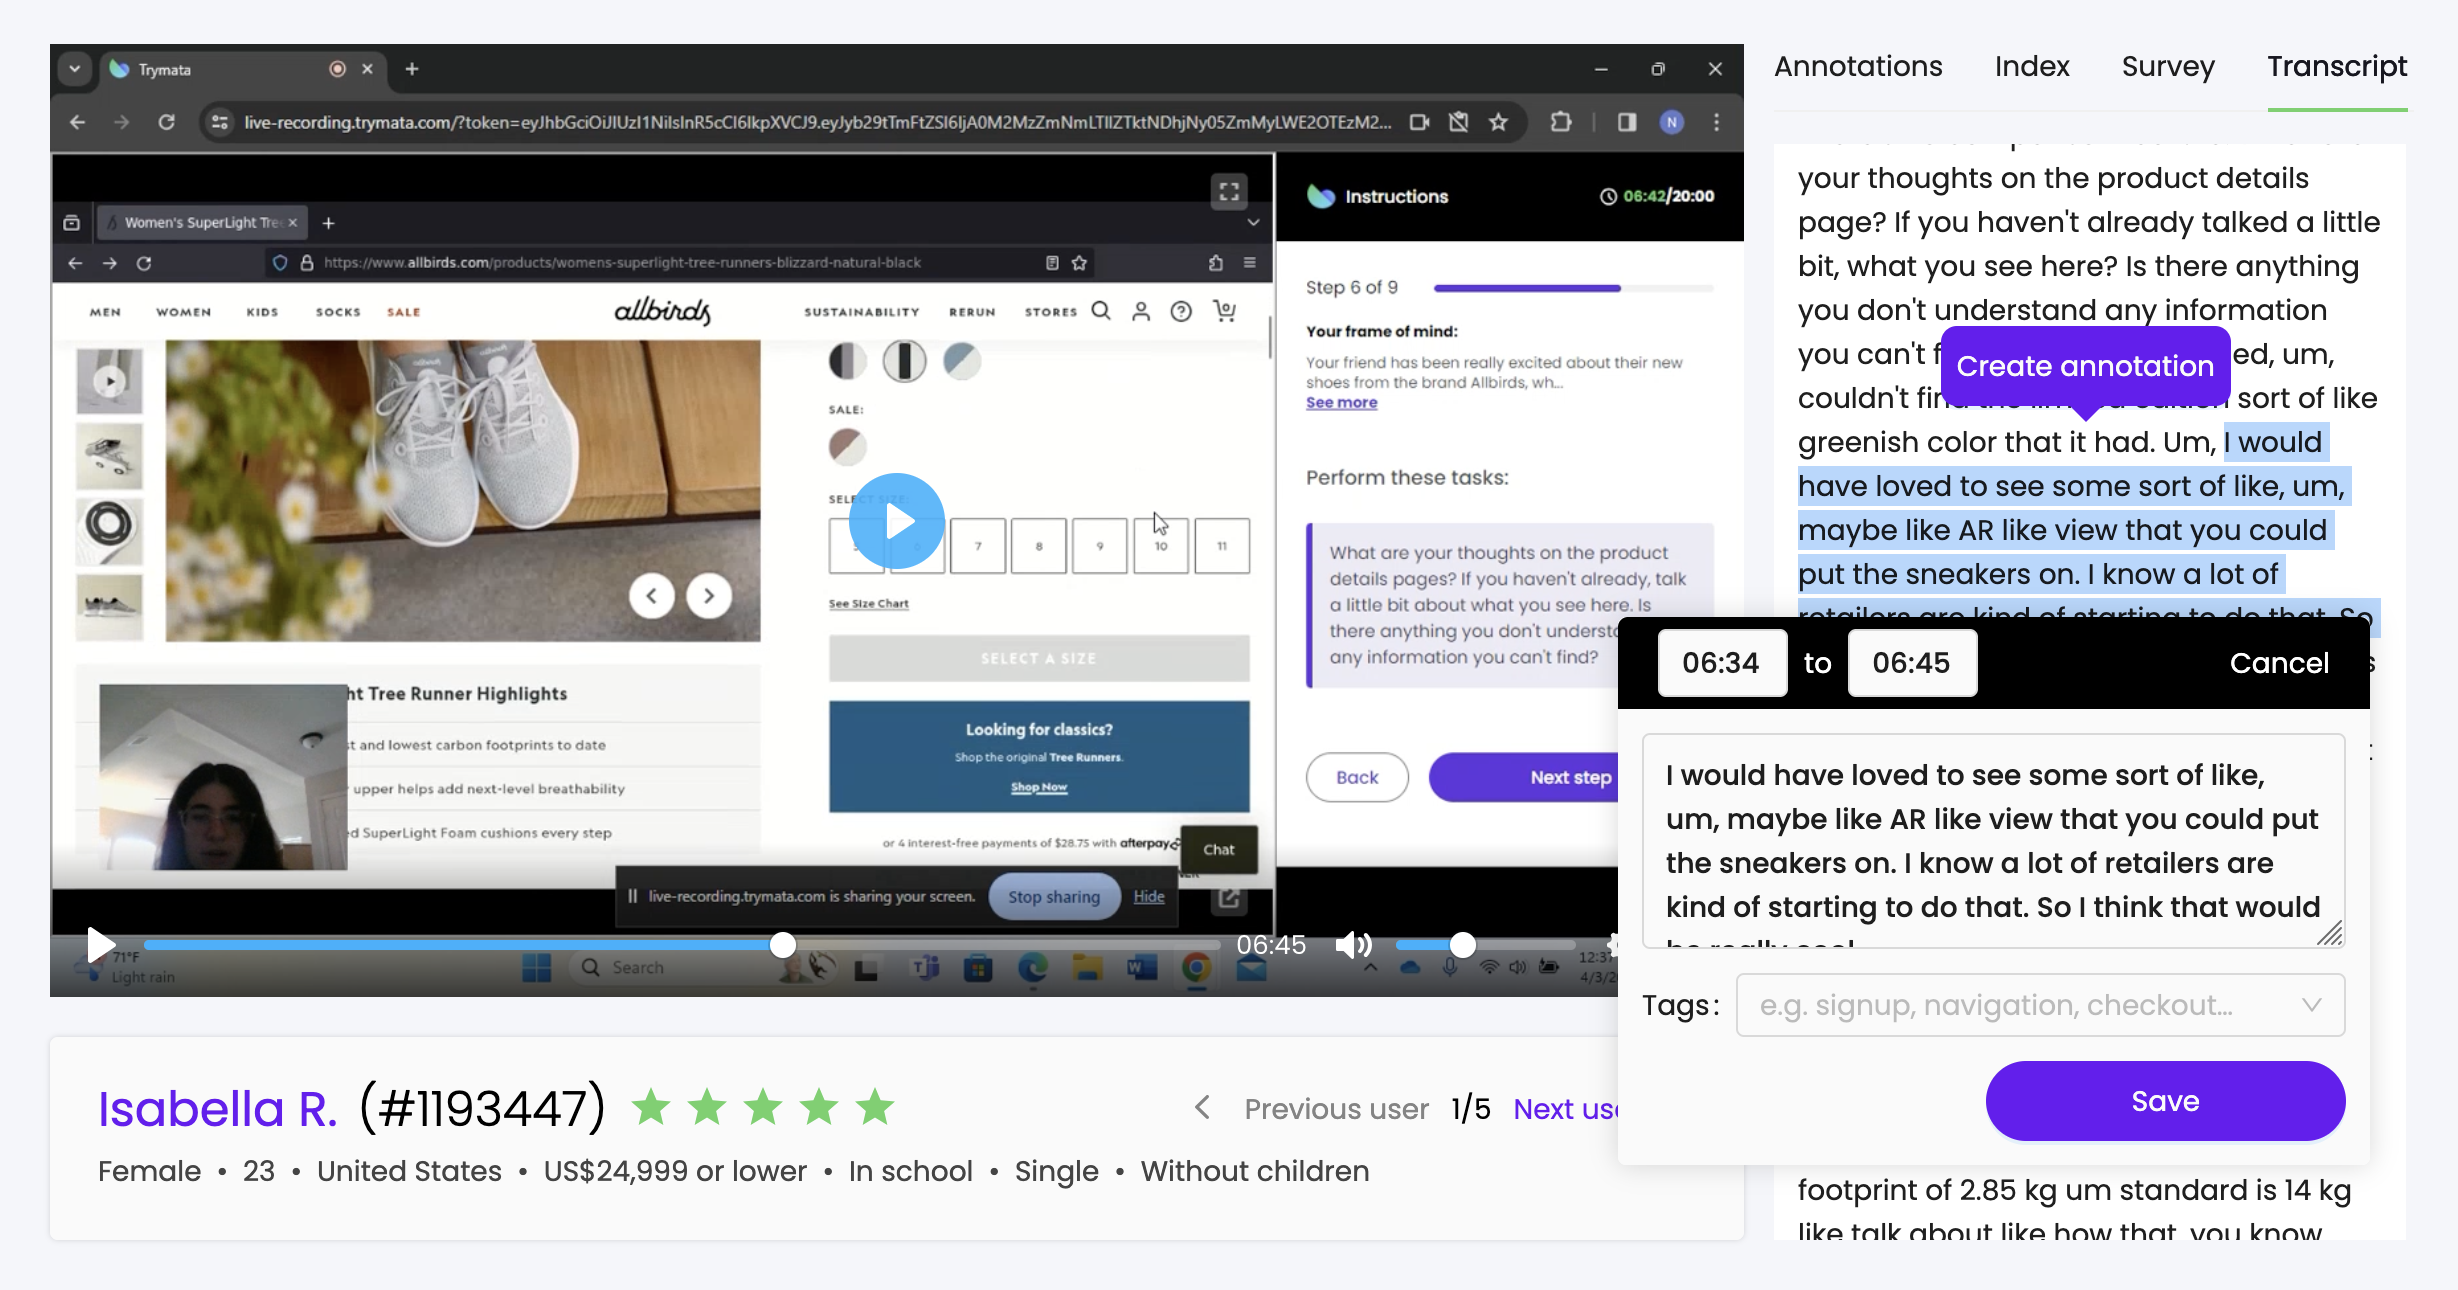
Clicking this button will immediately copy all of the highlighted text into the annotation editor. Not only that, it will also immediately fill the start & end times for the annotation based on the timestamps for the highlighted words.

If you’re new to Trymata’s transcription feature: Every individual word in the transcript has its own timestamp, and clicking on any word in your transcript view will jump you straight to that moment in the video.
So when you create an annotation from highlighting a section of the transcript, it will automatically be timestamped to exactly match the portion of the video where the tester is speaking those precise words.
With the text and timestamps automatically added in the annotation editor box, you have the option to edit any of them – whether that’s to clean up “um”s and “uh”s from the user’s speech, add your own thoughts in the note, insert tags for sorting and categorizing your note, or anything else. Or, you can click the “Save” button right away and be done!
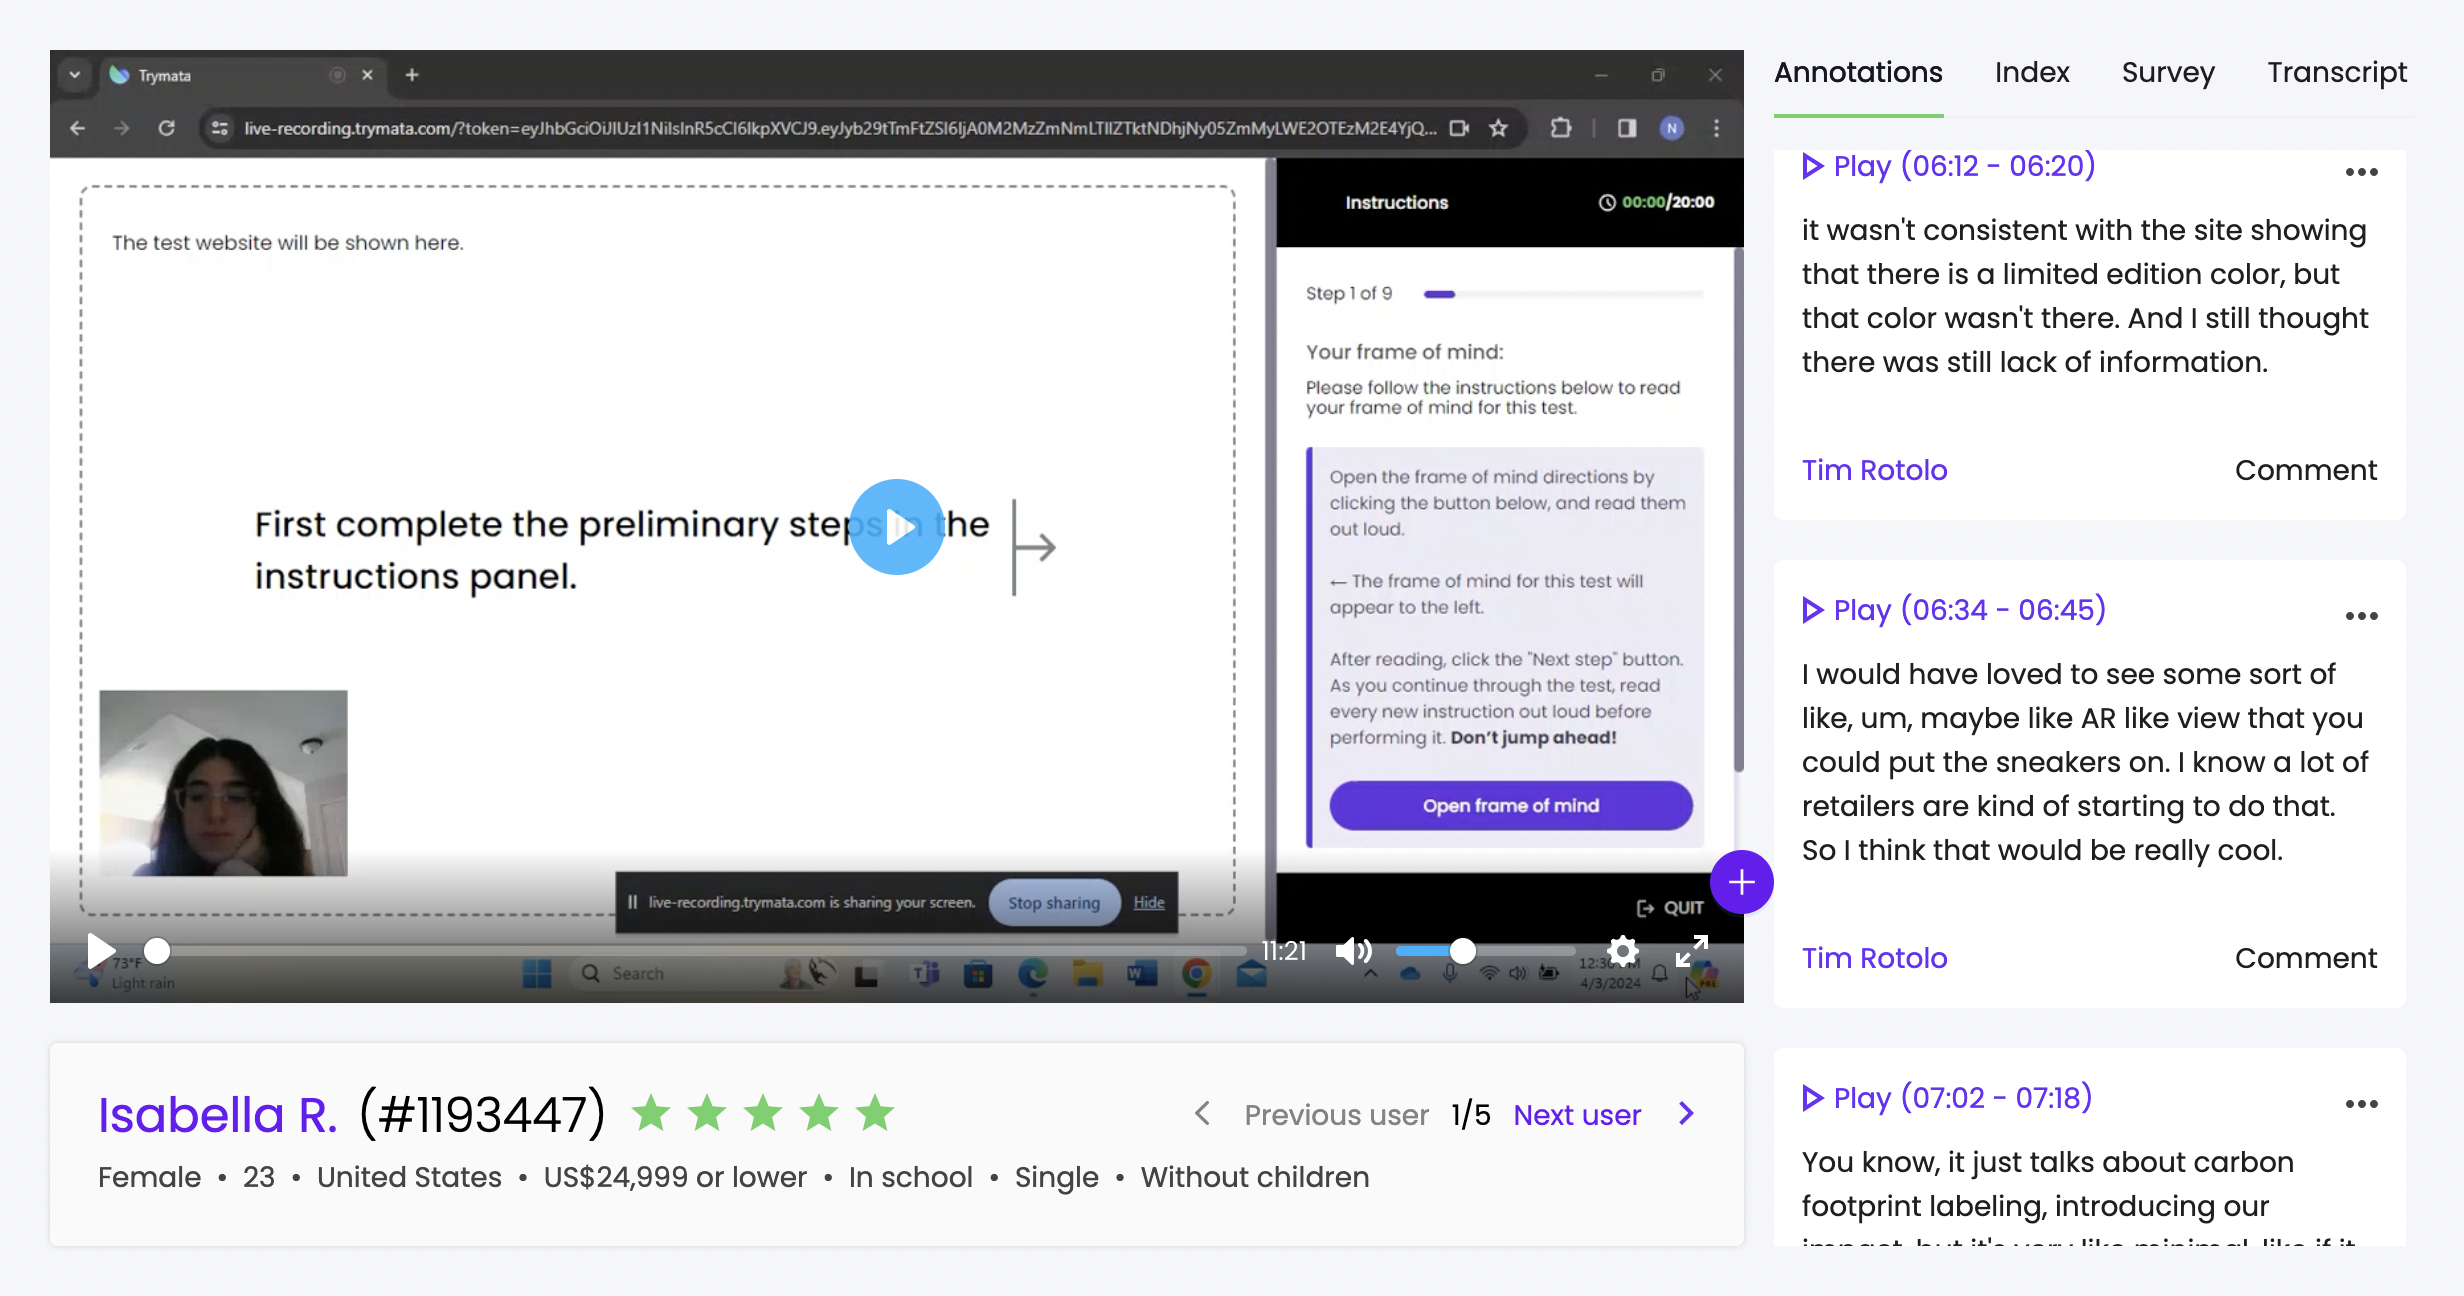
That annotation will now show alongside your video with a play link, so you can easily jump right back to that moment whenever you want – or share the clip with colleagues or clients.

With all of the key video moments saved in annotations next to your user video, your research becomes much more powerful, and all the easier to turn into real UX improvements.
We hope you enjoy using this handy new feature as you analyze your user test videos!


