


User research can take many forms, depending on the questions you’re trying to answer. Usability testing, for example, is a great fit for questions about how people interact with your digital products, where they run into pain points, and what elements of the UX frustrate or confuse them.
Some user research questions, though, are more suited to just sitting down with users and talking to them – asking questions and hearing their thoughts, emotions, desires, and motivations. For research cases like this, an “in-deth interview” (or IDI) is a great tool for unlocking the user insights you need.
Here at Trymata, we’ve just released a new interviews feature, for those research phases where an IDI is the best fit. Read below to get all the details about our new interviews suite.
How to set up a Trymata interview
In your Trymata customer account, you will now see different dashboard views for your usability tests and your interviews.
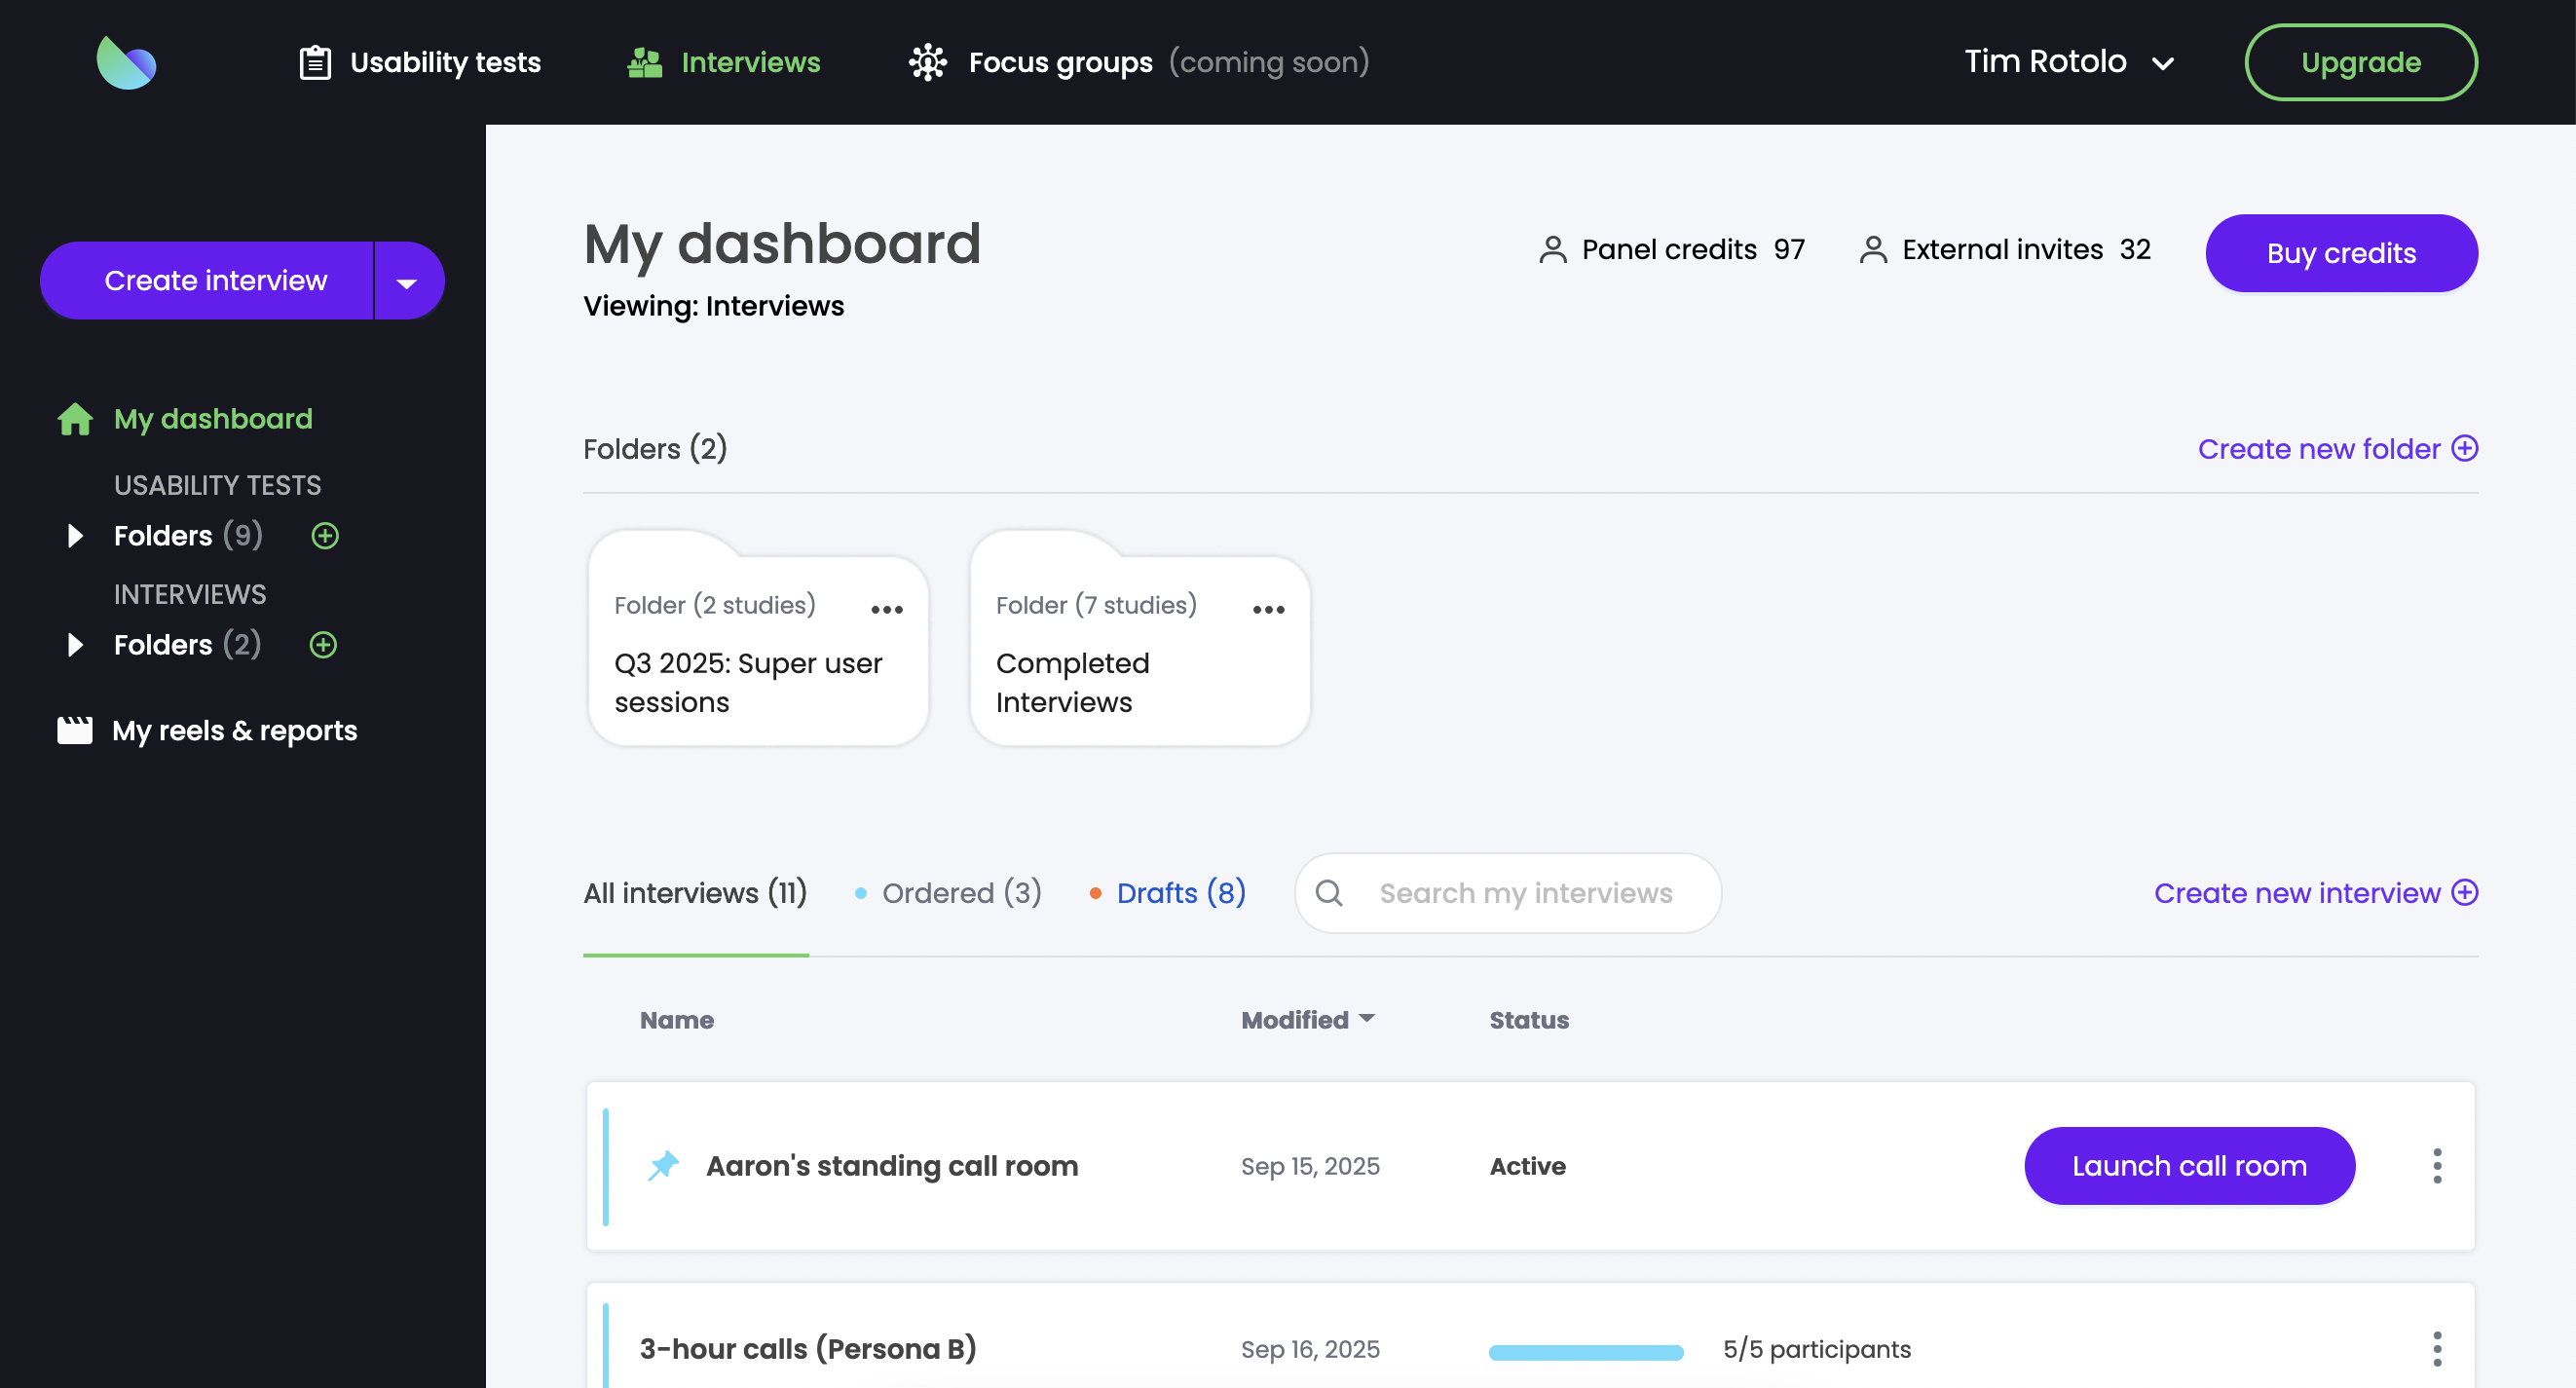
Your interviews dashboard has all the same functionalities as your tests dashboard: monitoring fulfillment progress, searching for specific studies, creating and managing folders, adding collaborators, and more.
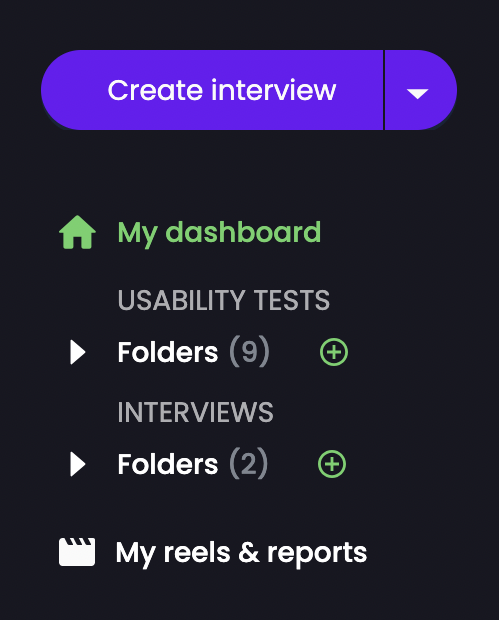
New interviews can be created from this interview dashboard, or from the new multi-option “Create” button in the updated side menu.
There are 2 creation flows available when you set up a Trymata interview: our default quick version, or the advanced version.
Quick interview setup
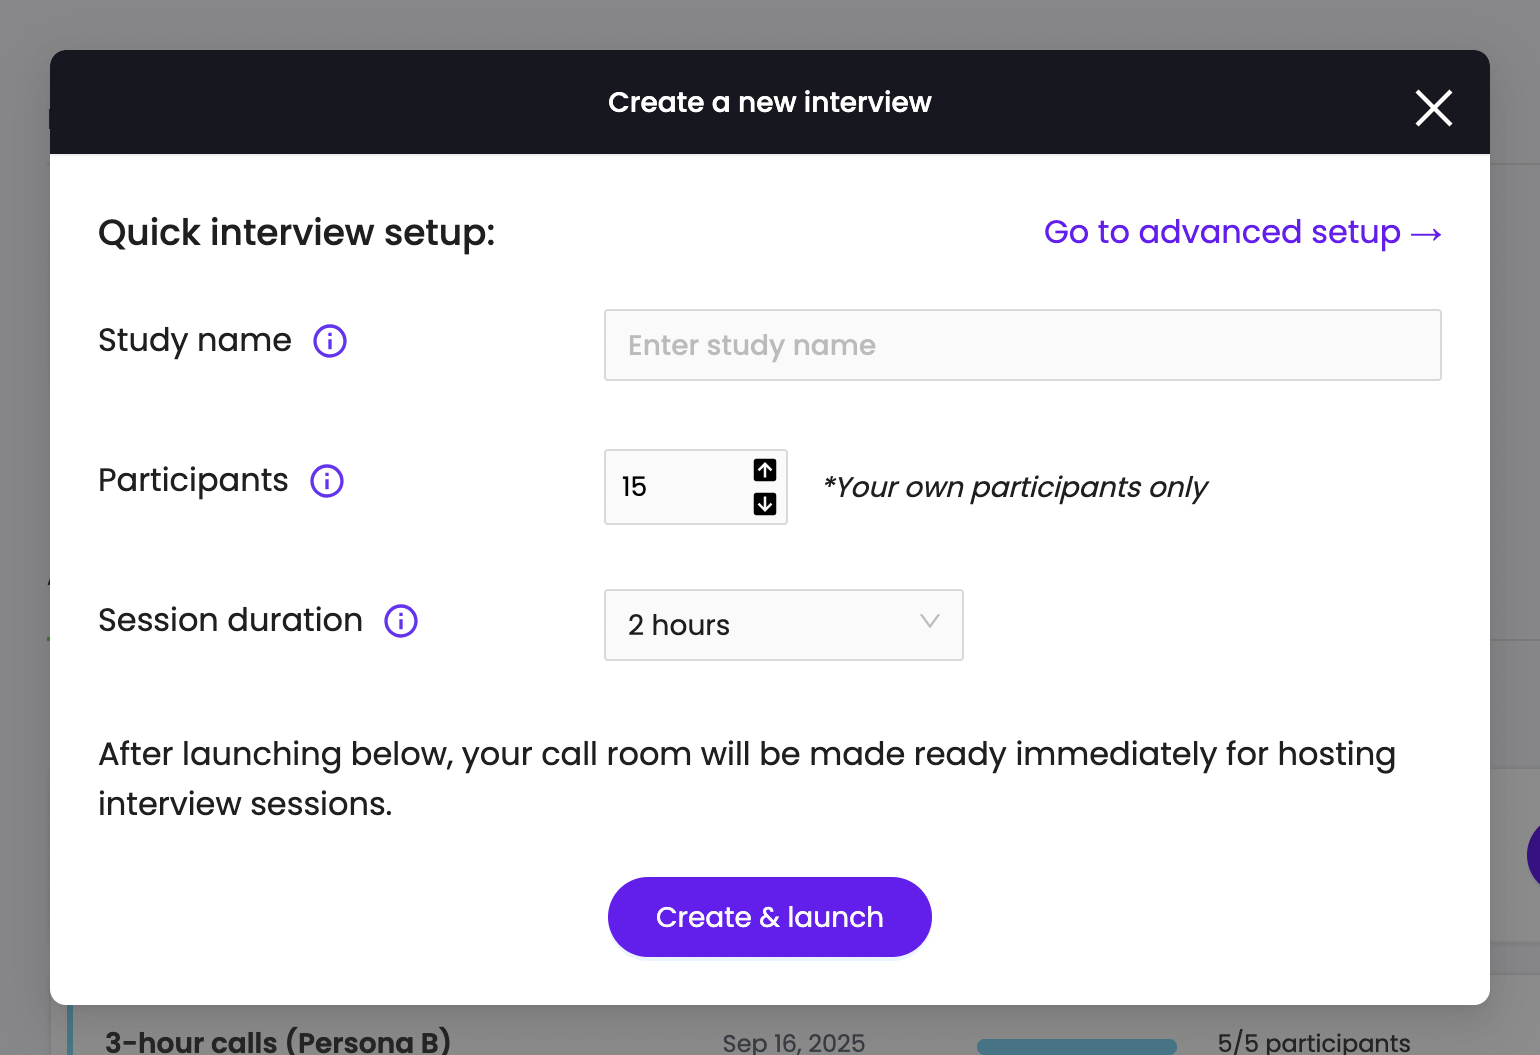
When you first click to create a new interview, you’ll get our short setup form: just 3 fields, and 1 click to create and launch.
In this quick and easy version, the only things you need to enter are:
- An internal title for your study,
- The number of sessions you want to run, and
- The time duration per session
By the way, for interviews we’ve added extended session length options – each call can go up to 3 hours!
Advanced interview setup
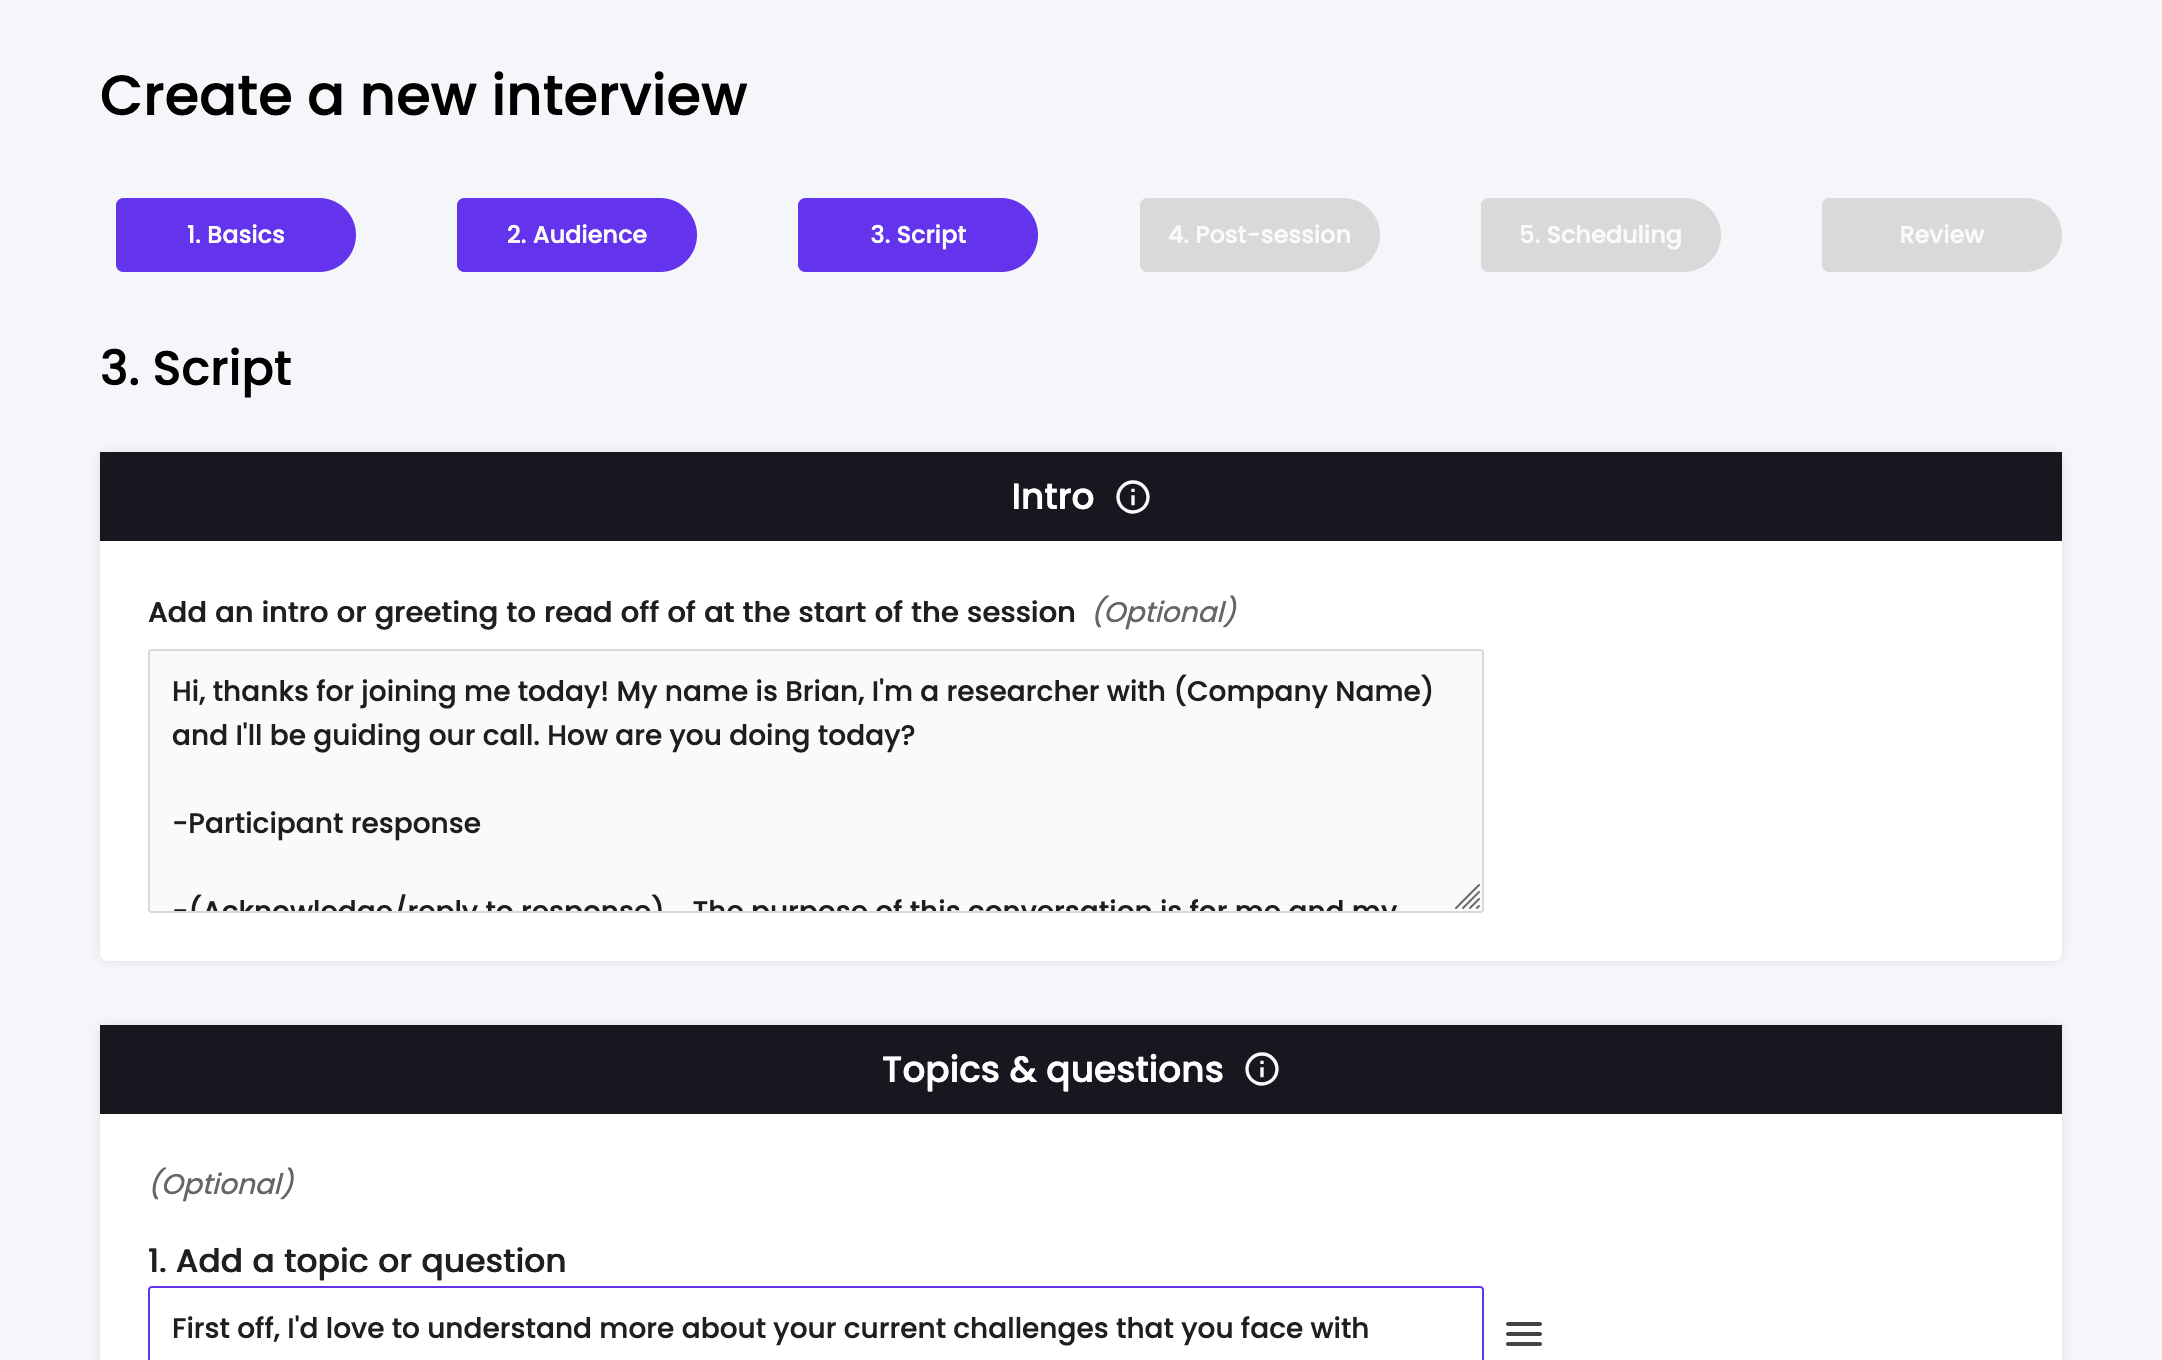
If you want to customize more aspects of your interview setup, you can open the advanced creation flow (which is more similar to our classic user test setup).
In the advanced form, you’ll be able to add things like pre-interview screeners, NDAs, a script for you to follow during the call, wrap-up survey questions, and more.
Other things to know
Recruitment: For now, interviews are only available to run with your own users – not the Trymata panel. We will be adding interviews with our panel in the future; in the meantime, for pressing needs please feel free to ask your customer success representative about Trymata custom recruitment for interviews!
Scheduling: No scheduling is needed for Trymata interviews! After launch, your interview call room will remain open and available to use as long as you have unfulfilled slots. Just coordinate with your participants to arrange meeting times, and come back to use the room any time to host your sessions.
After your order is full, you can always reopen it for more slots, or duplicate an existing study to create a new interview setup.
Running your Trymata interview
As soon as you launch an interview, you will get the share links for your call room (participant link, observer link, and moderator link).
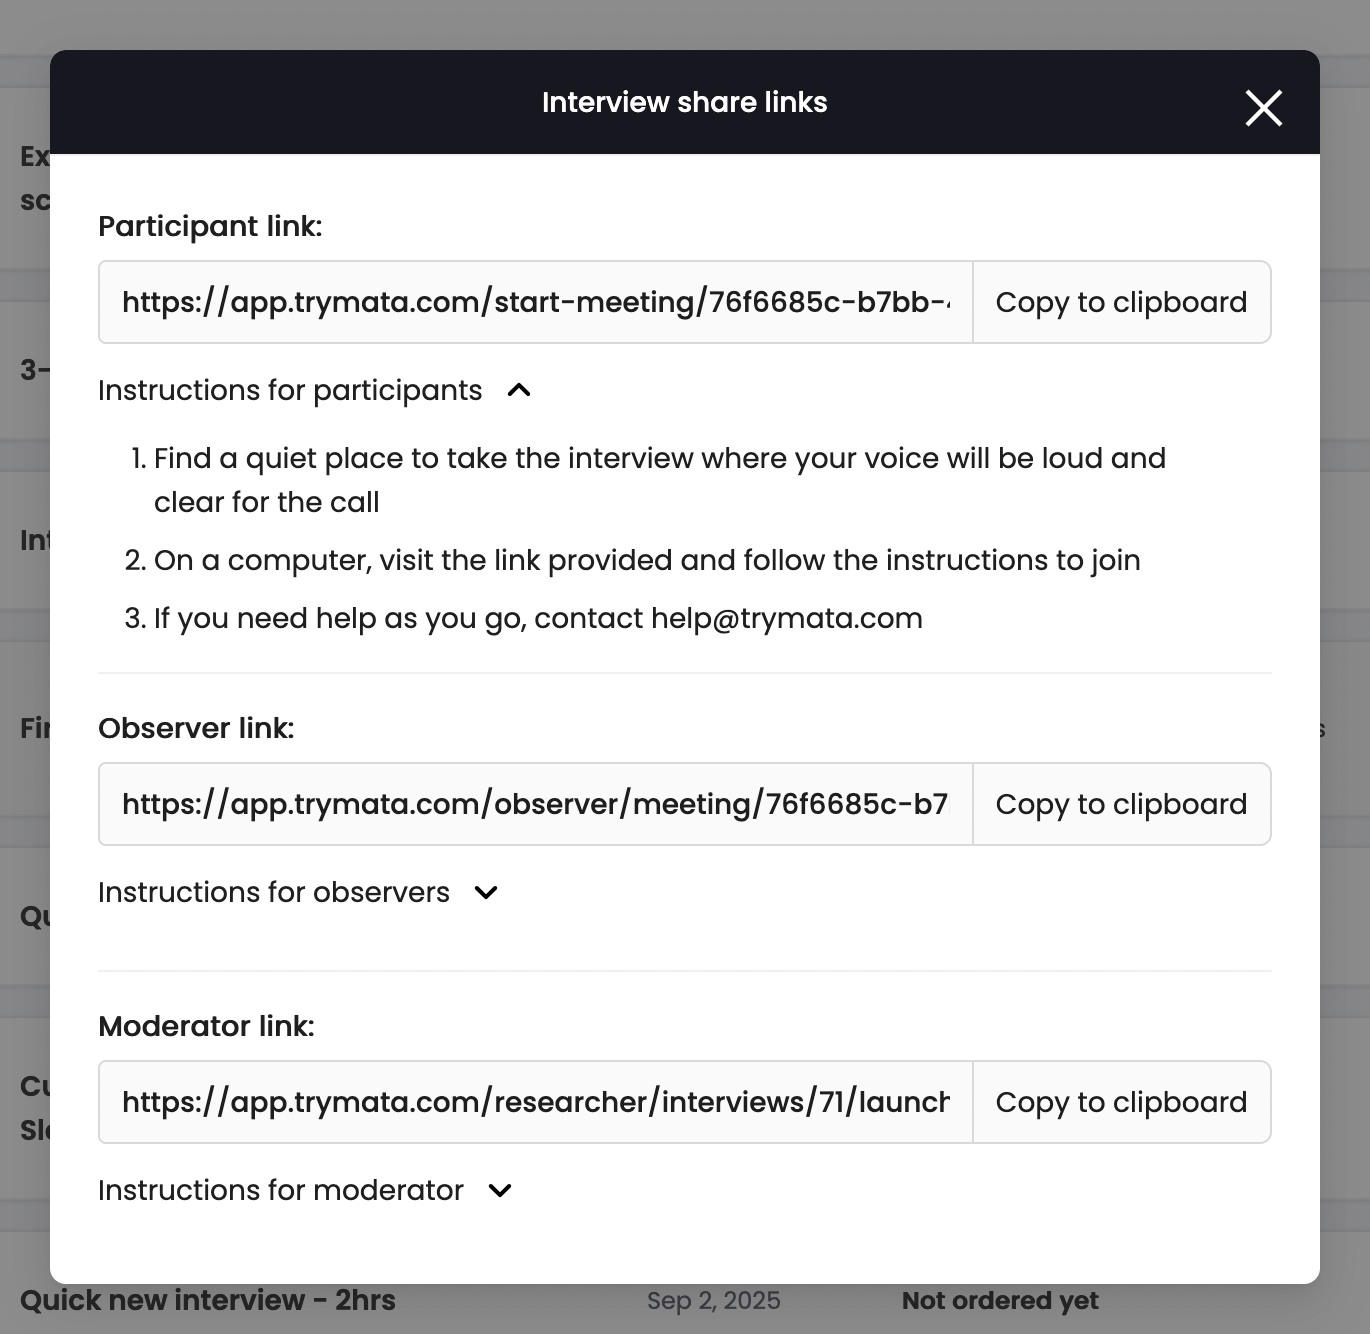
You can start using the call room right away – so if you’re in a hurry to meet with someone, you can set up your interview, send them the link, and dive into conversation all within a matter of minutes.
Keep reading below for a precise breakdown of the facilitation flow:
1. Invite participants and observers
First, copy the share links for your interview room, and send them to everyone you’d like to involve. Let them know what day & time they should join.
For interviews, you can only have 1 participant, or interviewee, in the call at a time. (If you do want to talk to multiple participants all together, keep an eye out for our focus group feature coming soon!)
On the other hand, there is no limit to the number of observers that can join. Observers may be members of your Trymata organization (who can join via the share link or directly from their accounts), or guests. Guests do not have to create a Trymata account to sit in, watch, and take notes; they just need to have the link.
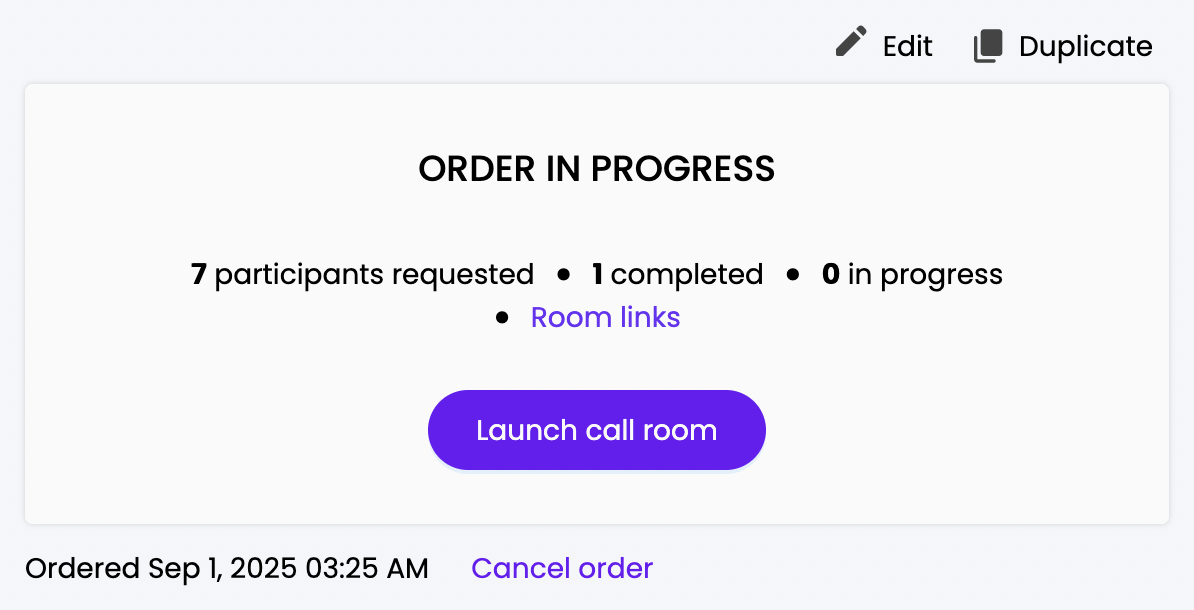
2. Initiate the call room
Only the moderator can open up the call room and initiate interview sessions. The moderator must be a Trymata account holder within your organization.
By default when setting up an interview, your own account will be assigned moderator status. If desired, you can choose any other organization member to moderate instead in the advanced setup form.
3. Begin a session
After opening the room, at first you’ll arrive at an invitation page that shows you when any participants and/or observers have joined the waiting room.
When ready, click the button to invite your participant. On their side, they’ll see an invite popup with a 30-second timer. In case they don’t accept it the first time, or any other issues, you can always retry after the timer runs out.
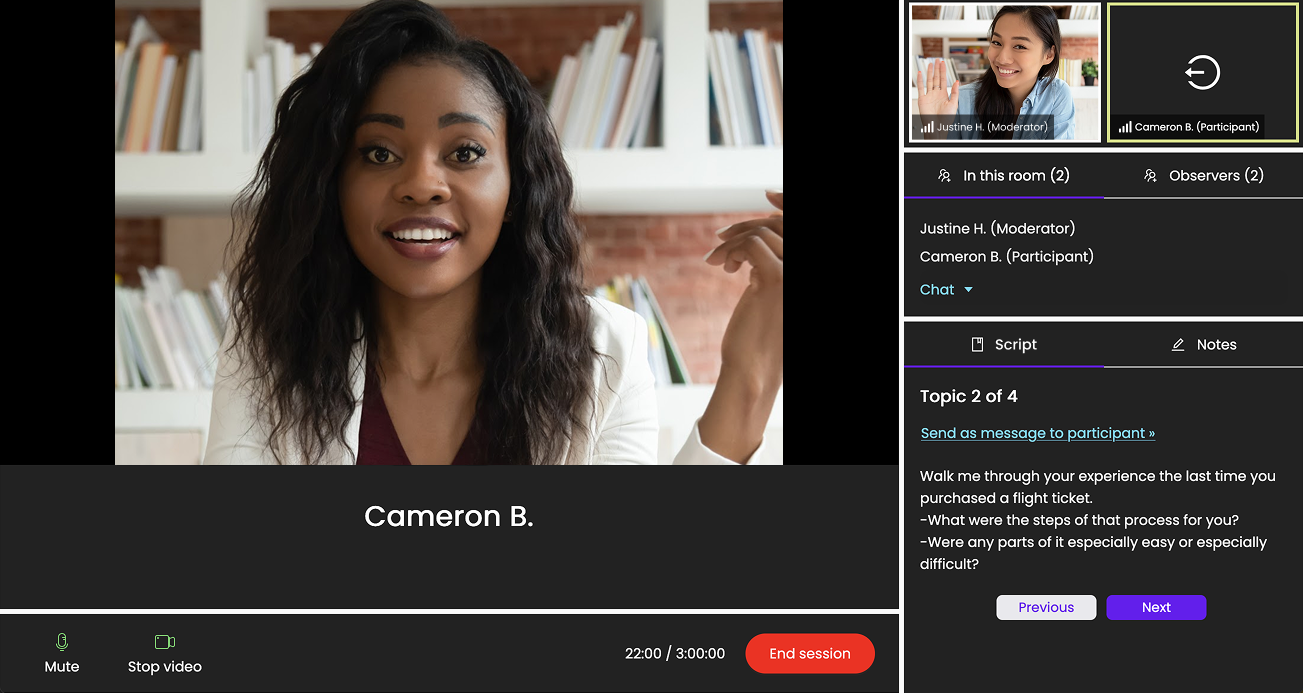
4. Interview your participant
Once they join the call, you’ll be connected via face camera and microphone (and live chat, in case you need it). Dive right in!
If you’ve prepared a script of topics or questions to work from during the call, they’ll be visible in your moderator view.
Observers will be invisible to the participant, but you will see them in a backroom section. Observers can live chat with you, and all of you can take notes that will be saved (with timestamps) alongside the session recording.
When the session is finished, the video recording will be available to play back, annotate, share, and turn into highlight reels from your account.
How to get interviews for your Trymata plan
Interviews is a feature module that you can add to your existing Trymata plan. If you’d like to start using this new feature, get in touch with your customer success representative!
Or, schedule a call to chat with us >
Even before you’ve added interviews to your plan, you can freely explore this new module. All customers have access to visit the new interviews dashboard, play around with the setup flows, and create draft interview studies.
We look forward to sharing more powerful new UX research features with you soon!